![]()
![]()
")
")
")
")
")
")
")

Teams have been streaming their events through Facebook or Youtube in the past - and this might still work as it is where you might find your less technical or socially engaged audience. Yet, more and more federated platforms like Mastodon are making headway. There's also a federated video server platform out there called PeerTube. This means that "the PeerTube" doesn't exist. There are a lot of servers - big and small - and they can talk to each other.
Live Streaming through PeerTube is basically using an rtmp-stream. This sounds very technical, but basically all the magic happens under the hood. Once it's set up, it's easy as candy. And that's exactly what we're going to do here.
So the first thing you'll need, is a PeerTube instance that allows live streaming. For this example, we're going to use the TROM TF server over at videos.trom.ff. The TROM community believes in the importance of Software Freedom and generously invites us to use their servers if we want to. As their servers are located in Europe, there probably will be other PeerTube instances out there closer to where you live. If you find other servers that like to support live streams for our community, feel free to mention them in the comments! If you expect to attract more than a few people to your live stream, it's only so polite to ask the maintainer of the PeerTube instance if they're okay with hosting a bigger sized event. The last thing you want is getting kicked off because of a misunderstanding.
Because of how PeerTube works, the location of the servers isn't as critical though. Especially with a lot of viewers in the same region, the video-stream will be shared peer to peer. This means that every viewer will be forwarding the stream to the next viewer. This way, we all share in the bandwidth and packages will arrive to your audience quicker.
So for the following example, I'll use TROM, but replace the link with your own instance if you're using another one.
When visiting videos.trom.tf, you'll get a button to request an account. If requesting an account on TROM, take the steps (please abide the rules of the house) and explain that you're organizing Software Freedom Day (and the date and URL of your event). A moderator will review and likely approve your request.
Once your account is approved, you can go to the next step.
On your first login, you're asked to set up your profile. More details on that, can be found in the PeerTube documentation.
You will also have to create at least one "channel" (topical collection) for your videos. It would make sense to call that "Software Freedom Day 2024" for example.
At a later moment you could then cut your live stream in pieces (e.g. in the PeerTube studio or using a tool like ShotCut or KDEnlive)
In the top right corner, you have a button "Publish" that allows you to upload recordings, or initiate a live stream. That's what we're going to use...
After pressing that button, you get to see the Publishing page.
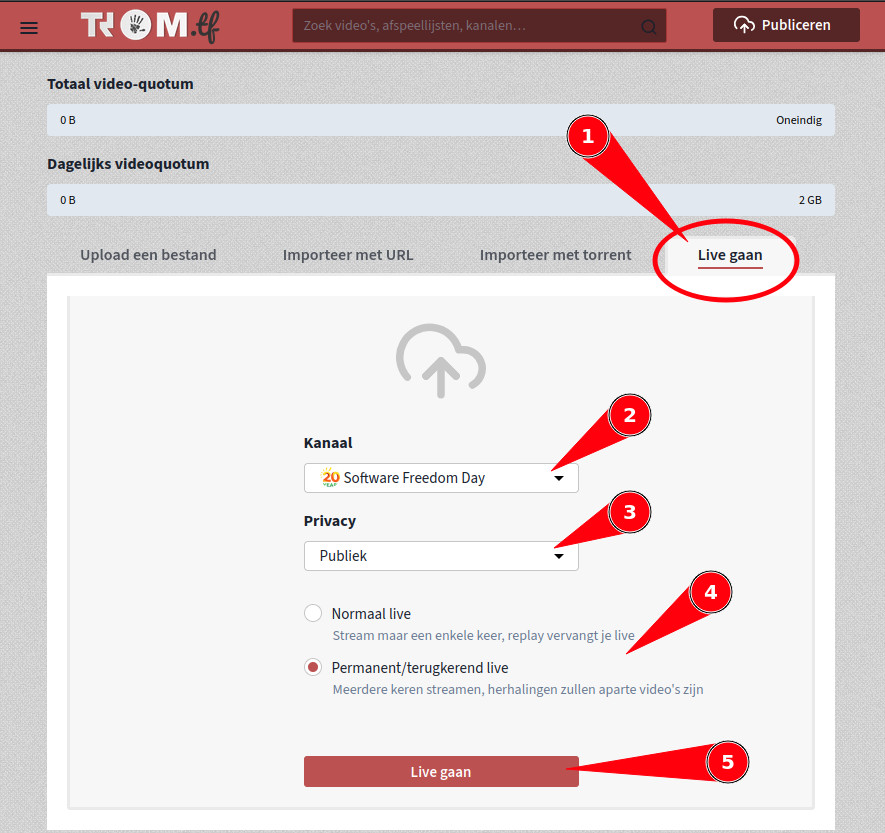
Enter the basic information for your stream (don't click on the Apply button yet...)
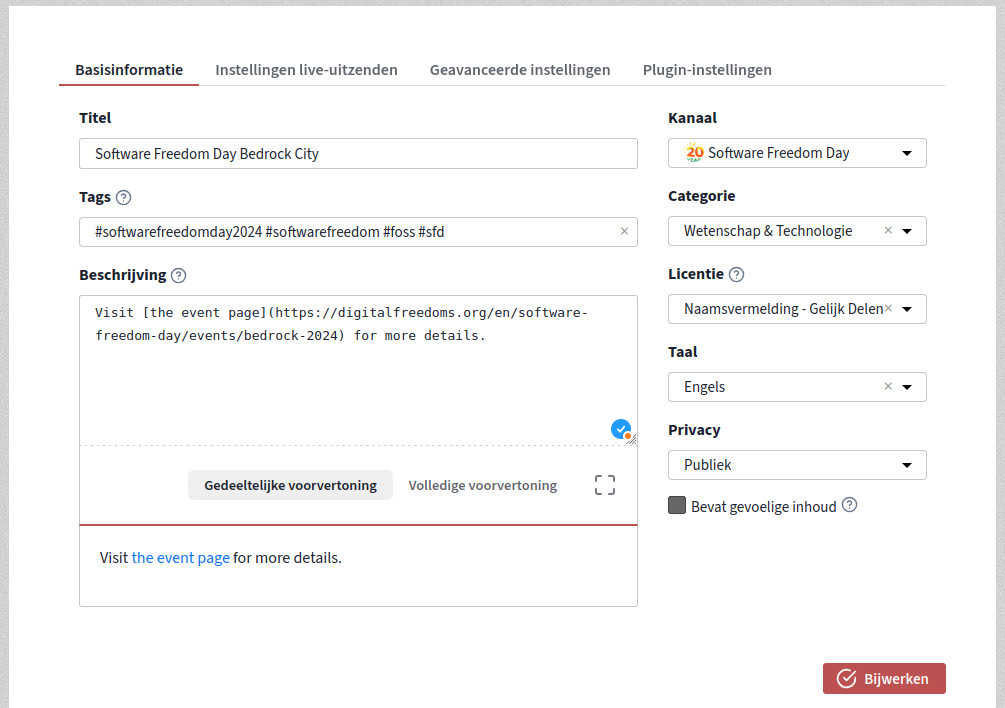
In the plugin settings, you can enable or disable chat. You can also put in a table of content (but might not make much sense yet as you probably don't have exact timings yet)
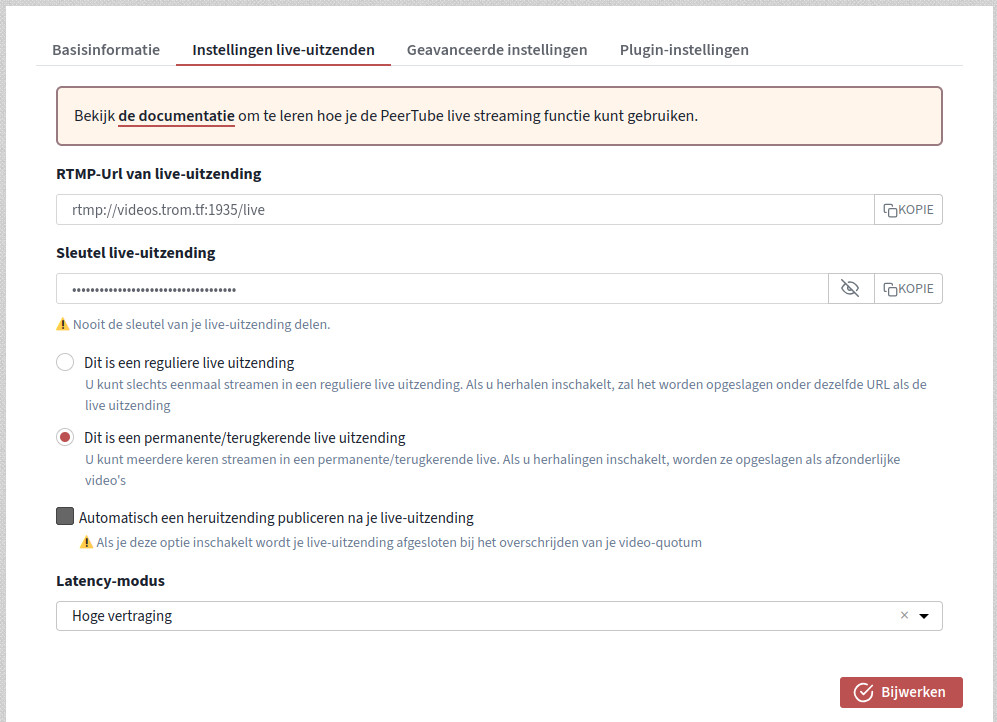
There's an important setting under "Live Settings" (2nd tab) at the bottom: Latency-mode. Please don't set that to Low Latency, you're imposing a heavy burden on the server. If you expect a bigger audience, maybe even allow high-latency. This way the burden gets shared over many pears and the traffic will stay more local.
If you have a really long live stream (e.g. more than 4 hours or high quality stream), you might consider recording your stream locally and not automatically push your recording live when the stream is done. This because when you reach the cap on your daily quotum, it will stop streaming. And you really don't want that in a live stream... IF your streaming computer has enough power, I would always recommend disabling this feature.
On the Live Settings tab, you'll also find the RTMP-url and the key for the live stream. Keep this page open to copy these values into OBS Studio.
Go to the OBS website to get the download instructions for your OS of choice.
With OBS Studio, you can go crazy in all the options to set up your live stream screen... there are plenty of tutorials out there, probably even in your own language. The Quick Start Guide is a good place to start.
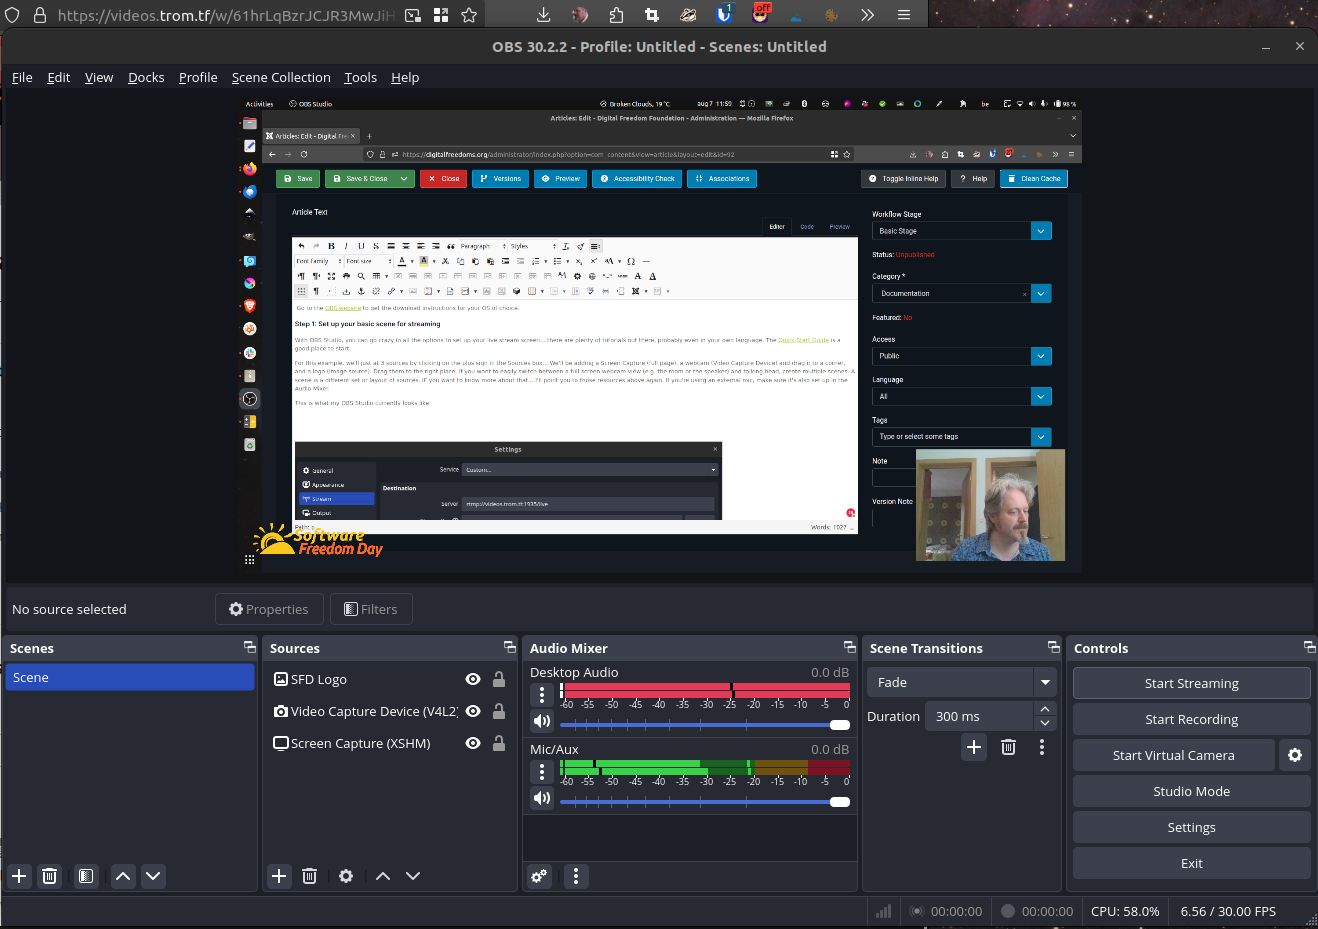
For this example, we'll just at 3 sources by clicking on the plus sign in the Sources box... We'll be adding a Screen Capture (full page), a webcam (Video Capture Device) and drag it to a corner, and a logo (image source). Drag them to the right place. If you want to easily switch between a full screen webcam view (e.g. the room or the speaker) and talking head, create multiple scenes. A scene is a different set or layout of sources. IF you want to know more about that... I'll point you to those resources above again. If you're using an external mic, make sure it's also set up in the Audio Mixer. Set up your audio levels so they are often just into the orange, but rarely peak into the reds (that's my setting, I'm not an expert)
This is what my OBS Studio currently looks like:
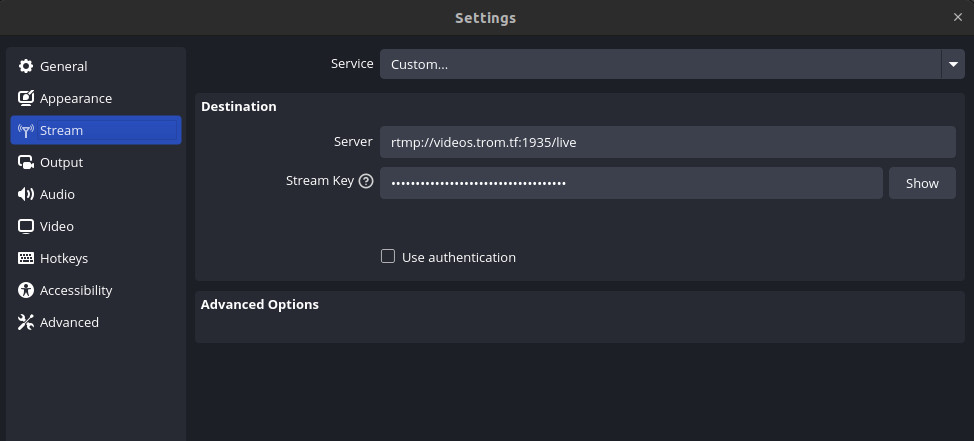
In the main screen (see above), click on the "Settings" button and navigate to the "Stream" item. Here pull open the Service pull-down and pick "Custom..."
Once here, you can enter the server and Stream Key that you get in PeerTube above. Just copy/paste it to avoid typos. If this (and optionally other settings) are set up, press the OK button.
A few settings you might consider:
- if you have an nVidia (more or less recent) graphics card, be sure to also enable hardware decoding in the Output tab.
In the main screen, click on the button "Start Streaming". It will take a short while (up to 60 seconds, also depending on your latency settings in PeerTube). Make sure to not watch (or listen) your own live stream when talking. It is extremely distracting and will cause you to trip up.